10 tips for creating artwork for a great looking disc
Want a great looking CD or DVD to help sell your product or get your message out? A good first impression and a strong company image go a long way in achieving success. These ten tips will get you started on creating high-quality, print ready artwork for your next project.
1. Communicate with your Printer
Check with your vendor to see if they have specific instructions for creating and submitting artwork. Communication is the key to getting a great looking DVD or CD without any additional set-up or editing fees. If they do not have specific instructions, then use the tips listed below.
2. High Resolution Artwork – 300dpi or Greater
Create your artwork in a major graphics program like Adobe Photoshop, Illustrator, InDesign or QuarkXPress. The minimum resolution should be 300dpi (dots per inch) or greater. We recently added a new digital 600dpi printer, so only artwork that is greater than 300dpi will take advantage of this new printers capabilities. The better resolution of your artwork, the better your on-disc printing results will be.
3. Use Your Vendor's Template
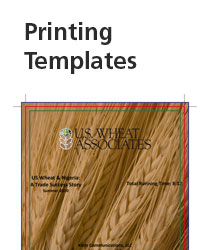
Use your vendor’s templates whenever possible. This will also help with measurements like inner hub or stacking ring diameters and the outer edge bleed. Using your vendor’s templates should ensure that your project will move quickly and smoothly into the production phase and eliminate the possibility of additional graphic design fees.
Download Templates
4. Recommend Graphic Formats
TIFF (.tif)
Adobe Photoshop (.psd)
EPS (.eps)
JPEG (.jpg) – usually accepted
PDF (.pdf) – usually accepted
5. Layered Files
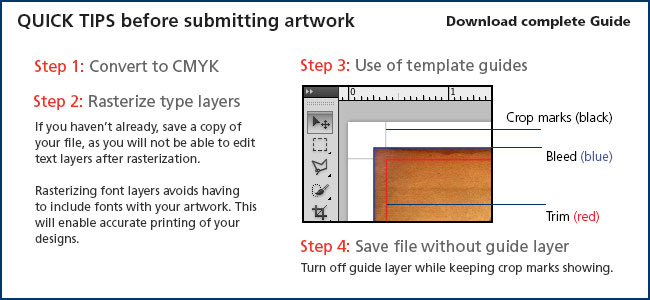
Provide your artwork as a layered file. This will help if a minor change like fixing a misspelling is required. If you have guidelines in your art file, make sure they are in a layer so they can be easily removed before the printing process begins.
With layered artwork, fonts can be a problem if not rasterized. With vector files it also best to outline fonts to make sure there are no problems for your vendors. Save your original artwork with layers and non-outlined fonts for future revisions and to make editing easy without having to recreate artwork to make simple type changes.
6. Create Your Artwork in CMYK
Because your vendor will be printing using the CMYK process, please submit your artwork in CMYK mode. If you create your artwork in the RGB color space, it can be converted it to CMYK, but this may cause the colors to shift.
7. Font Size and Selection
Keep your font size no smaller than 7pt, and at least 8pt for reverse type. For smaller type use simpler fonts like Arial, Helvetica, or Times New Roman. Elaborate fonts with lots of detail will have the best results at 12pt or higher. Also, provide your vendor with any exotic fonts used in your artwork in case your printer does not have them. Outlining your fonts in Adobe Illustrator is another good practice to ensure you get superior results.
8. Send all Original Source Images
Send all of your original source images so the printer can verify the quality. Do use web images and never take a low-resolution image and try to increase it to 300dpi in Photoshop as it will always result in a blurry art file. Images on your website are compressed to be as small as possible so they load faster in a web browser. Images need to have a lot more information for a quality professionally printed disc than they do for a website. Your web images will appear blurry, pixilated and generally poor-quality if they are used to print your disc. You should provide the original images before they were compressed for the internet. Lastly, do not stretch small images to make them fit, as this will also cause poor printing output.
9. Safety Margin
Do not put important information such as text or an important part of a photo or graphic up against the crop lines as some may get cut off. Keep your type and other important elements at least 1/8" inside the crop marks. This holds true for both the outer edge of the disc and the inner hub or stacking ring area.

10. Do Not Crop the Center Hub Area
For best results do not crop out your image from the center hub area. Keep in mind that you should keep any important text away from the inner hub safe area.


